Skip links

Calibration Standards

ISO-CAL North America ASTM & ISO Calibration Standards

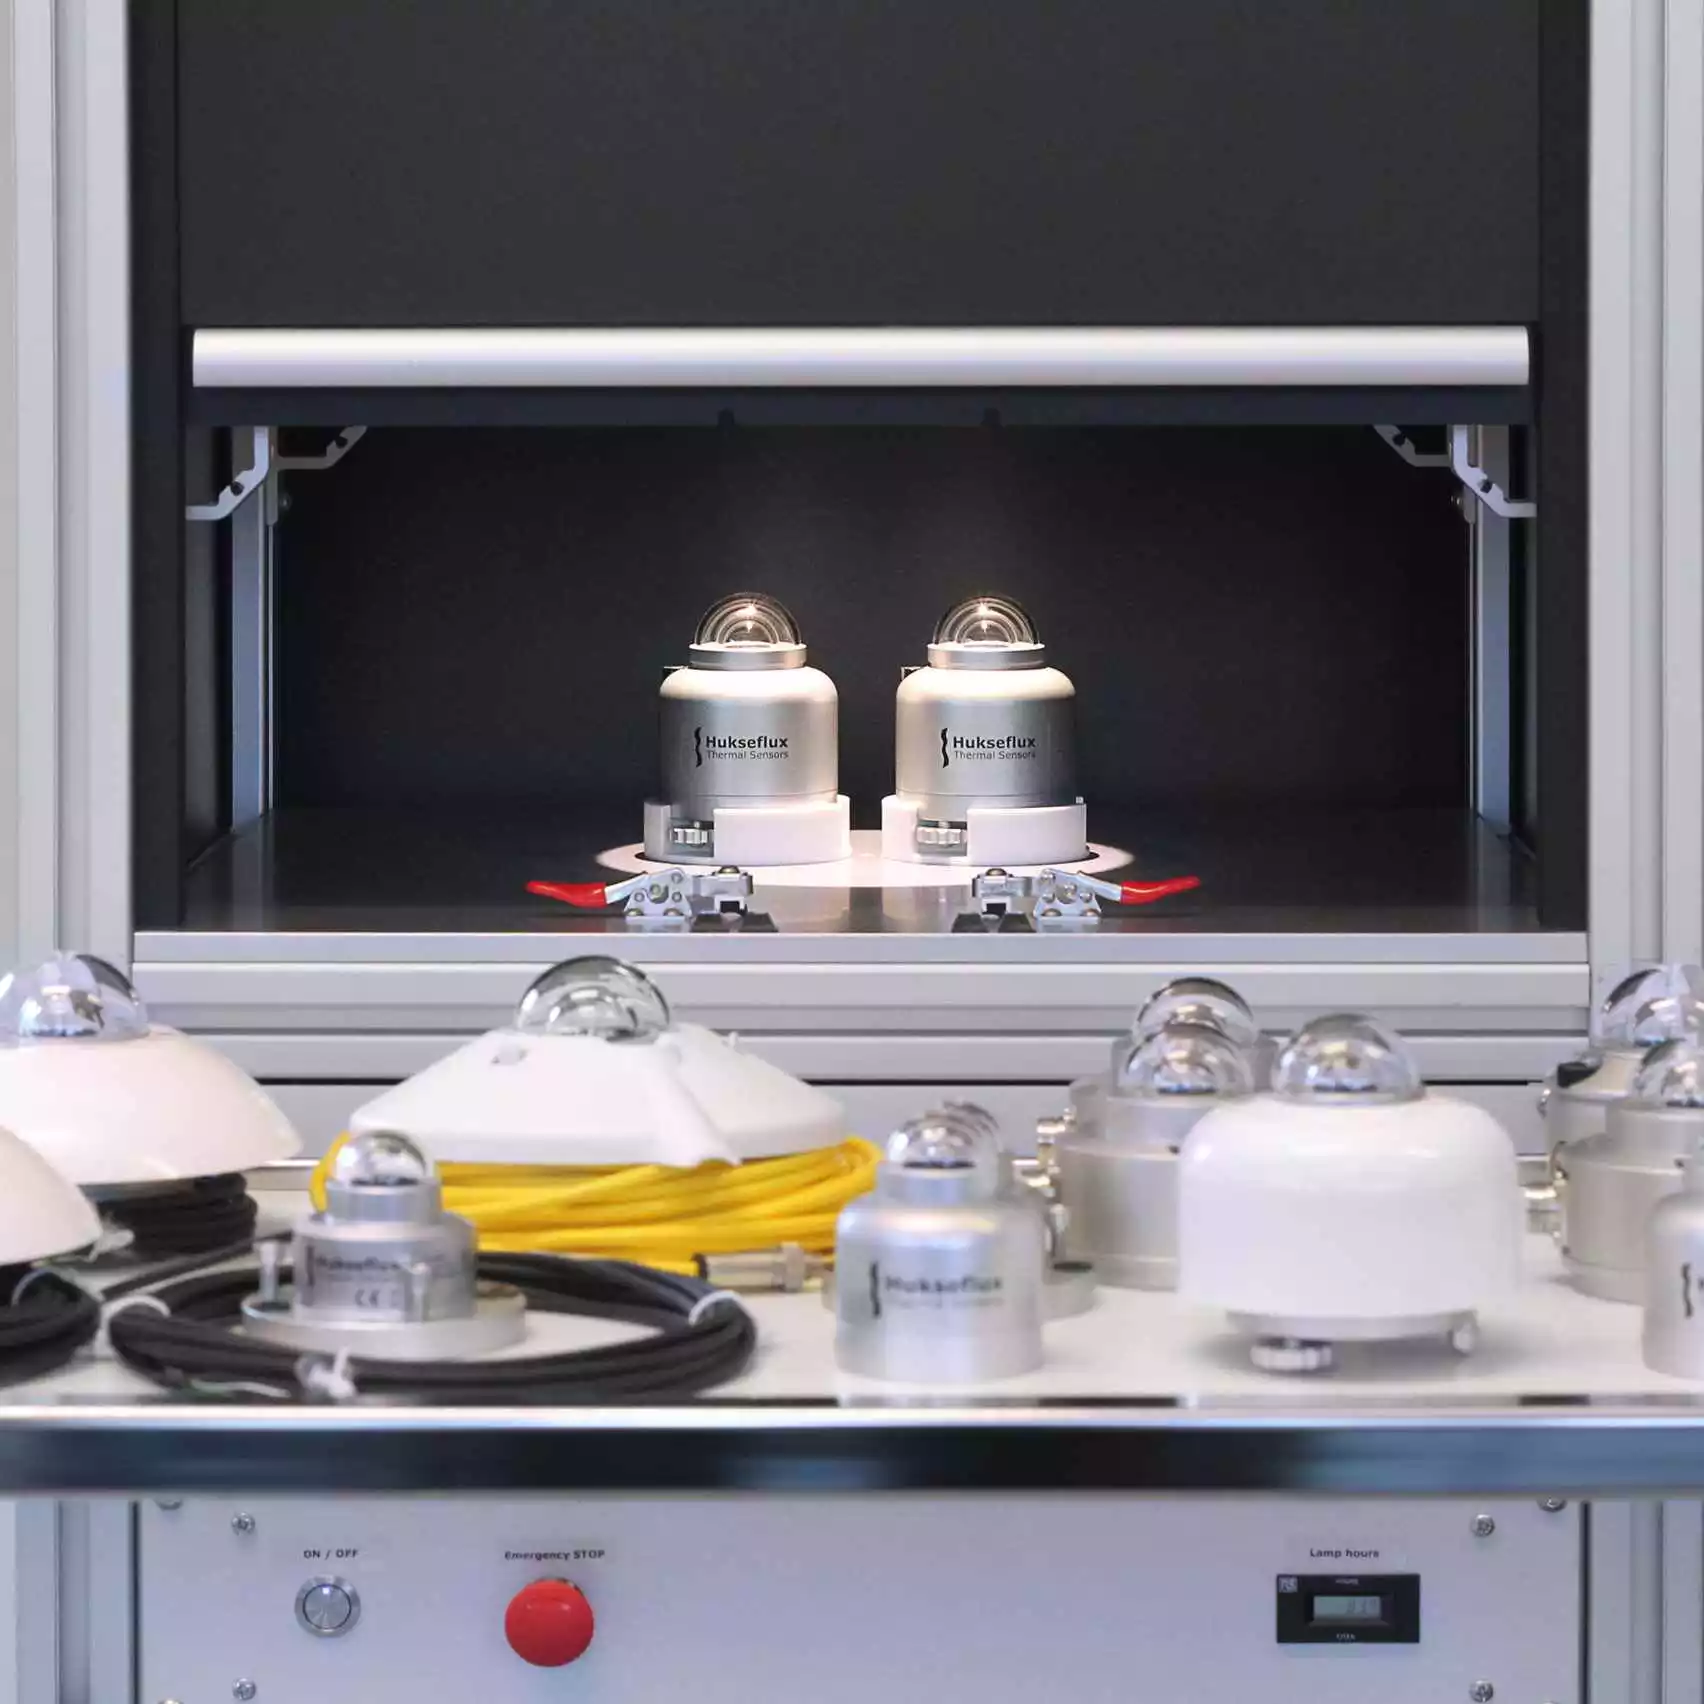
ASTM G207-11 Standard Test Method for Indoor Transfer of Calibration From Reference to Field Pyranometers

Scope:

1.1 The method described in this standard applies to the indoor transfer of calibration from reference to field radiometers to be used for measuring and monitoring outdoor radiant exposure levels.

1.2 This test method is applicable to field radiometers regardless of the radiation receptor employed but is limited to radiometers having approximately 180° (2π Steradian), field angles.

1.3 The calibration covered by this test method employs the use of artificial light sources (lamps).

1.4 Calibrations of field radiometers are performed with sensors horizontal (at 0° tilt from the horizontal to the earth). The essential requirement is that the reference radiometer shall have been calibrated at a horizontal tilt as employed in the transfer of calibration.

1.5 The primary reference instrument shall not be used as a field instrument and its exposure to sunlight shall be limited to outdoor calibration or intercomparisons.

Note 1: At a laboratory where calibrations are performed regularly it is advisable to maintain a group of two or three reference radiometers that are included in every calibration. These serve as controls to detect any instability or irregularity in the standard reference instrument.

1.6 Reference standard instruments shall be stored in a manner as to not degrade their calibration.

1.7 The method of calibration specified for total solar pyranometers shall be traceable to the World Radiometric Reference (WRR) through the calibration methods of the reference standard instruments (Method and Test Method), and the method of calibration specified for narrow- and broad-band ultraviolet radiometers shall be traceable to the National Institute of Standards and Technology (NIST), or other internationally recognized national standards laboratories (Standard).

1.8 This standard does not purport to address all of the safety concerns, if any, associated with its use. It is the responsibility of the user of this standard to establish appropriate safety and health practices and determine the applicability of regulatory limitations prior to use.

Significance and Use:

The methods described represent a means for calibration of field radiometers employing standard reference radiometers indoors. Other methods involve the natural sunlight outdoors under clear skies and various combinations of reference radiometers. Outdoor these methods are useful for cosine and azimuth correction analyses but may suffer from a lack of available clear skies, foreground view factor, and directionality problems. Outdoor transfer of calibrations is covered by standards, and several configurations of artificial sources are possible, including:

Point sources (lamps) at a distance, to which the sensors are exposed

Extended sources (banks of lamps, or lamp(s) behind diffusing or “homogenizing” screens) to which the sensors are exposed

Various configurations of enclosures (usually spherical or hemispherical) with the interior walls illuminated indirectly with lamps. The sensors are exposed to the radiation emanating from the enclosure walls.

Traceability of calibration for pyranometers is accomplished when employing the method using a reference global pyranometer that has been calibrated and is traceable to the World Radiometric Reference (WRR). For the purposes of this test method, traceability shall have been established if a parent instrument in the calibration chain can be traced to a reference pyrheliometer that has participated in an International Pyrheliometric Comparison (IPC) conducted at the World Radiation Center, (WRC), Davos, Switzerland.

The reference global pyranometer (for example, one measuring hemispherical solar radiation at all wavelengths) shall have been calibrated by the shading-disk, component summation, or outdoor comparison method against one of the following instruments:

An absolute cavity pyrheliometer that participated in a World Meteorological Organization (WMO) sanctioned IPCs (and therefore possesses a WRR reduction factor).

An absolute cavity radiometer that has been intercompared (in a local or regional comparison) with an absolute cavity pyrheliometer meeting 5.3.1.1.

Alternatively, the reference pyranometer may have been calibrated by direct transfer from a World Meteorological Organization (WMO) First-Class pyranometer that was calibrated by the shading-disk method against an absolute cavity pyrheliometer possessing a WRR reduction factor, or by direct transfer from a WMO Standard Pyranometer (see WMO’s Guide WMO No. 8 for a discussion of the classification of solar radiometers). See Zerlaut for a discussion of the WRR, the IPCs, and their results.

Note 4: Any of the absolute radiometers participating in the above intercomparisons and being within ±0.5 % of the mean of all similar instruments compared in any of those intercomparisons, shall be considered suitable as the primary reference instrument.

Traceability of calibration of narrowband (for example, Ultraviolet) radiometers is accomplished when employing the method using a reference narrow band radiometer that has been calibrated and is traceable to the National Institute of Standards and Technology (NIST), or other national standards organizations.

The reference narrow band radiometer, regardless of whether it measures total ultraviolet solar radiation or narrowband UV-A or UV-B radiation, or a defined narrowband segment of ultraviolet radiation, shall have been calibrated by one of the following:

By comparison to a standard source of spectral irradiance that is traceable to NIST or to the appropriate national standards organizations of other countries using appropriate filters and filter correction factors [for example, Drummond].

By comparison of the radiometer output to the integrated spectral irradiance in the appropriate wavelength band of a spectroradiometer that has itself been calibrated against such a standard source of spectral irradiance.

By comparison to a spectroradiometer that has participated in a regional or national Intercomparison of Spectroradiometers, the results of which are of reference quality.

Note 5: The calibration of reference ultraviolet radiometers using a spectroradiometer, or by direct calibration against standard sources of spectral irradiance (for example, deuterium or 1000 W tungsten-halogen lamps) is the subject of Standard.

The calibration method employed assumes that the accuracy of the values obtained with respect to the calibration source used is applicable to the deployed environment, with additional sources of uncertainty due to logging equipment and environmental effects above and beyond the calibration uncertainty.

The principal advantages of indoor calibration of radiometers are user convenience, lack of dependence on weather, and user control of test conditions.

The principal disadvantages of indoor calibrations are the possible differences between natural environmental influences and the laboratory calibration conditions with respect to the spectral and spatial distribution of the source radiation (sun and sky versus lamps or enclosure walls).

It is recommended that the reference radiometer be of the same type as the test radiometer, since any difference in spectral sensitivity between instruments will result in erroneous calibrations. However, The calibration of sufficiently broadband detectors (approximately 700 nm or more), such as silicon photodiode detectors with respect to extremely broadband (more than 2000 nm) thermopile radiometers is acceptable, as long as the additional increased uncertainty in the field measurements, due to spectral response and spectral mismatch limitations, is acceptable. The reader is referred to ISO TR 9673 and ISO TR 9901 for discussions of the types of instruments available and their use.

ISO 9846:1993 Solar Energy – Calibration of Field Pyranometers Using a Pyrheliometer

Introduction:

Accurate and precise measurements of the irradiance of the global (hemispherical) solar radiation are required in

  1. the determination of the energy available to flat-plate solar collectors,
  2. the assessment of irradiance and radiant exposure in the testing of solar and non-solar-related materials technologies, and
  3. the assessment of the direct versus diffuse solar components for energy budget analysis, geographic mapping of solar energy, and as an aid in the determination of the concentration of aerosol and particulate pollution and the effects of water vapor.

Although meteorological and resource assessment measurements generally require pyranometers oriented with their axis vertical, applications associated with flat-plate collectors and the study of the solar exposure of related materials require calibrations of instruments tilted at a predetermined non-vertical orientation. Calibrations at fixed tilt angles have applications that seek state-of-the-art accuracy, requiring corrections for cosine, tilt, and azimuth.

Scope:

1.1 This International Standard specifies two preferred methods for the calibration of field pyranometers using reference pyranometers.

1.2 One method, the outdoor calibration or type I, employs solar radiation as the source, while the other method, the indoor calibration or type II, employs an artificial radiation source.

1.2.1 The outdoor calibration of field pyranometers may be performed with the pyranometer in a horizontal position (i.e. zero tilt) (type Ia), in a tilted position (type Ib), or at normal incidence (type Ic) maintaining the receiver surface perpendicular to the sun’s beam component.

1.2.2 The indoor calibration of field pyranometers may be performed using an integrating sphere with shaded (type IIa) or unshaded (type IIb) lamp(s), or at normal incidence (type IIc) frequently using an optical bench to present the receiver surface perpendicular to the beam of the lamp.

Types IIa and IIb correspond to an outdoor calibration under conditions of overcast and sunny sky with large light cloud fields, respectively. Type IIc is comparable with the normal incidence calibration of type Ic.

1.3 The methods of calibration specified are traceable to the world radiometric reference (WRR); traceability to the international Pyrheliometric Scale of 1956 is not permitted.

1.4 This International Standard is applicable to most types of field pyranometers regardless of the type of radiation receptor employed. In general, all pyranometers used for long-term monitoring of incident solar irradiance may be calibrated by using the described methods, provided that the reference pyranometer has been calibrated at essentially the same tilt from horizontal as the tilt employed in the calibration.

NOTE 1: Pyranometers used for collector tests should be calibrated using a reference pyrheliometer (see ISO 9846).

ASTM G138-12 Standard Test Method for Calibration of a Spectroradiometer Using a Standard Source of Irradiance

Scope:

1.1 This test method covers the calibration of spectroradiometers for the measurement of spectral irradiance using a standard of spectral irradiance that is traceable to a national metrological laboratory that has participated in intercomparisons of standards of spectral irradiance.

1.2 This method is not limited by the input optics of the Spectro radiometric system. However, the choice of input optics affects the overall uncertainty of the calibration.

1.3 This method is not limited by the type of monochromator or optical detector used in the spectroradiometer system. Parts of the method may not apply to determine which parts apply to the specific spectroradiometer being used. It is important that the choice of monochromator and detector be appropriate for the wavelength range of interest for the calibration. Though the method generally applies to photodiode array detector-based systems, the user should note that these types of spectroradiometers often suffer from stray light problems and have a limited dynamic range. Diode array spectroradiometers are not recommended for use in the ultraviolet range unless these specific problems are addressed.

1.4 The calibration described in this method employs the use of a standard of spectral irradiance. The standard of spectral irradiance must have known spectral irradiance values at given wavelengths for a specific input current and clearly defined measurement geometry. Uncertainties must also be known for the spectral irradiance values. The values assigned to this standard must be traceable to a national metrological laboratory that has participated in intercomparisons of standards of spectral irradiance. These standards may be obtained from a number of national standards laboratories and commercial laboratories. The spectral irradiance standards consist mainly of tungsten halogen lamps with coiled filaments enclosed in a quartz envelope, though other types of lamps are used. Standards can be obtained with calibration values covering all or part of the wavelength range from 200 to 4500 nm.

1.5 This standard does not purport to address all of the safety concerns, if any, associated with its use. It is the responsibility of the user of this standard to establish appropriate safety and health practices and determine the applicability of regulatory limitations prior to use.

Significance and Use:

4.1 This method is intended for use by laboratories performing calibration of a spectroradiometer for spectral irradiance measurements using a spectral irradiance standard with known spectral irradiance values and associated uncertainties traceable to a national metrological laboratory that has participated in intercomparisons of standards of spectral irradiance, known uncertainties, and known measurement geometry.

4.2 This method is generalized to allow for the use of different types of input optics provided that those input optics are suitable for the wavelength range and measurement geometry of the calibration.

4.3 This method is generalized to allow for the use of different types of monochromators provided that they can be configured for a bandwidth, wavelength range, and throughput levels suitable for the calibration being performed.

4.4 This method is generalized to allow for the use of different types of optical radiation detectors provided that the spectral response of the detector over the wavelength range of the calibration is appropriate to the signal levels produced by the monochromator.

ASTM G130-12 Standard Test Method for Calibration of Narrow and Broadband Ultraviolet Radiometers Using a Spectroradiometer

Scope:

1.1 This test method covers the calibration of ultraviolet light-measuring radiometers possessing either narrow- or broad-band spectral response distributions using either a scanning or a linear-diode-array spectroradiometer as the primary reference instrument.

For transfer of calibration from radiometers calibrated by this test method to other instruments, Test Method E824 should be used.

NOTE 1: Special precautions must be taken when a diode-array spectroradiometer is employed in the calibration of filter radiometers having spectral response distributions below 320 nm wavelength. Such precautions are described in detail in subsequent sections of this test method.

1.2 This test method is limited to calibrations of radiometers against light sources that the radiometers will be used to measure during field use.

NOTE 2: For example, an ultraviolet radiometer calibrated against natural sunlight cannot be employed to measure the total ultraviolet irradiance of a fluorescent ultraviolet lamp.

1.3 Calibrations performed using this test method may be against natural sunlight, Xenon-arc burners, metal halide burners, tungsten and tungsten-halogen lamps, fluorescent lamps, etc.

1.4 Radiometers that may be calibrated by this test method include narrow, broad, and wide-band ultraviolet radiometers, narrow, broad, and wide-band visible-region-only radiometers, or radiometers having wavelength response distributions that fall into both the ultraviolet and visible regions.

NOTE 3: For purposes of this test method, narrow-band radiometers are those with Δλ ≤ 20 nm, broadband radiometers are those with 20 nm ≤Δλ ≤ 70 nm, and wide-band radiometers are those with Δλ ≥ 70 nm.

NOTE 4: For purposes of this test method, the ultraviolet region is defined as the region from 285 to 400 nm wavelength, and the visible region is defined as the region from 400 to 750 nm wavelength. The ultraviolet region is further defined as being either UV-A with radiation of wavelengths from 315 to 400 nm or UV-B with radiation from 285 to 315 nm wavelength.

1.5 This standard does not purport to address all of the safety concerns, if any, associated with its use. It is the responsibility of the user of this standard to establish appropriate safety and health practices and determine the applicability of regulatory limitations prior to use.

Significance and Use:

4.1 This test method represents the preferable means for calibrating both narrow-band and broadband ultraviolet radiometers. Calibration of narrow and broadband ultraviolet radiometers involving direct measurement of a standard source of spectral irradiance is an alternative method for calibrating ultraviolet radiometers. This approach is valid only if corrections for the spectral response of the instrument and the spectral mismatch between the calibration spectral distribution and the target spectral distribution can be computed. See Test Method for a description of the spectral mismatch calculation.

4.2 The accuracy of this calibration technique is dependent on the condition of the light source (for example, cloudy skies, polluted skies, aged lamps, defective luminaires, etc.), and on source alignment, source to receptor distance, and source power regulation.

NOTE 5: It is conceivable that a radiometer might be calibrated against a light source that represents an arbitrarily chosen degree of aging for its class in order to present to both the test and reference radiometers a spectrum that is most typical for the type.

4.3 Spectroradiometric measurements performed using either an integrating sphere or a cosine receptor (such as a shaped PTFE3, or Al2O3 diffuser plate) provide a measurement of hemispherical spectral irradiance in the plane of the sphere’s entrance port. As such, the aspect of the receptor plane relative to the reference light source must be defined (azimuth and tilt from the horizontal for solar measurements, normal incidence with respect to the beam component of sunlight, or normal incidence and the geometrical aspect with respect to an artificial light source, or array). It is important that the geometrical aspect between the plane of the spectroradiometer’s source optics and that of the radiometer being calibrated be as nearly identical as possible.

NOTE 6: When measuring the hemispherical spectral energy distribution of an array of light sources (for lamps), the normal incidence is defined by the condition obtained when the plane of the receiver aperture is parallel to the plane of the lamp, or burner, emitting area.

4.4 Calibration measurements performed using a spectroradiometer equipped with a pyrheliometer-comparison tube (a sky-occluding tube), regardless of whether affixed directly to the monochromator’s entrance slit, to the end of a fiber optic bundle, or to the aperture of an integrating sphere, shall not be performed unless the radiometer being calibrated is configured as a pyrheliometer (possesses a view-limiting device having the approximate optical constants of the spectroradiometer’s pyrheliometer-comparison tube).

4.5 Spectroradiometric measurements performed using source optics other than the integrating sphere or the “standard” pyrheliometer comparison tube shall be agreed upon in advance between all involved parties.

4.6 Calibration measurements that meet the requirements of this test method are traceable to a national metrological laboratory that has participated in intercomparisons of standards of spectral irradiance, largely through the traceability of the standard lamps and associated power supplies employed to calibrate the spectroradiometer according to G138, the manufacturer‘s specified procedures, or CIE Publication 63.

4.7 The accuracy of calibration measurements performed employing a spectroradiometer is dependent on, among other requirements, the degree to which the temperature of the mechanical components of the monochromator is maintained during field measurements in relation to those that prevailed during calibration of the spectroradiometer.

NOTE 7: This requirement is covered in detail in an ASTM standard under development in Subcommittee G03.09 on Radiometry.

ISO 9847:1992 Solar Energy – Calibration of Field Pyranometers by Comparison to a Reference Pyranometer

Introduction:

Accurate and precise measurements of the irradiance of the global (hemispherical) solar radiation are required in

  1. the determination of the energy available to flat-plate solar collectors,
  2. the assessment of irradiance and radiant exposure in the testing of solar and non-solar-related materials technologies, and
  3. the assessment of the direct versus diffuse solar components for energy budget analysis, geographic mapping of solar energy, and as an aid in the determination of the concentration of aerosol and particulate pollution and the effects of water vapor.

Although meteorological and resource assessment measurements generally require pyranometers oriented with their axis vertical, applications associated with flat-plate collectors and the study of the solar exposure of related materials require calibrations of instruments tilted at a predetermined non-vertical orientation. Calibrations at fixed tilt angles have applications that seek state-of-the-art accuracy, requiring corrections for cosine, tilt, and azimuth.

Scope:

1.1 This International Standard specifies two preferred methods for the calibration of field pyranometers using reference pyranometers.

1.2 One method, the outdoor calibration or type I, employs solar radiation as the source, while the other method, the indoor calibration or type II, employs an artificial radiation source.

1.2.1 The outdoor calibration of field pyranometers may be performed with the pyranometer in a horizontal position (i.e. zero tilt) (type Ia), in a tilted position (type Ib), or at normal incidence (type Ic) maintaining the receiver surface perpendicular to the sun’s beam component.

1.2.2 The indoor calibration of field pyranometers may be performed using an integrating sphere with shaded (type IIa) or unshaded (type IIb) lamp(s), or at normal incidence (type IIc) frequently using an optical bench to present the receiver surface perpendicular to the beam of the lamp.

Types IIa and IIb correspond to an outdoor calibration under conditions of overcast and sunny sky with large light cloud fields, respectively. Type IIc is comparable with the normal incidence calibration of type Ic.

1.3 The methods of calibration specified are traceable to the world radiometric reference (WRR); traceability to the international Pyrheliometric Scale of 1956 is not permitted.

1.4 This International Standard is applicable to most types of field pyranometers regardless of the type of radiation receptor employed. In general, all pyranometers used for long-term monitoring of incident solar irradiance may be calibrated by using the described methods, provided that the reference pyranometer has been calibrated at essentially the same tilt from horizontal as the tilt employed in the calibration.

NOTE 1: Pyranometers used for collector tests should be calibrated using a reference pyrheliometer (see ISO 9846).

ASTM E824-10 Standard Test Method for Transfer of Calibration From Reference to Field Radiometers

Scope:

1.1 The method described in this standard applies to the transfer of calibration from reference to field radiometers to be used for measuring and monitoring outdoor radiant exposure levels. This standard has been harmonized with ISO 9847.

1.2 This test method is applicable to field radiometers regardless of the radiation receptor employed but is limited to radiometers having approximately 180° (2π Steradian), field angles.

1.3 The calibration covered by this test method employs the use of natural sunshine as the source.

1.4 Calibrations of field radiometers may be performed at a tilt as well as horizontal (at 0° from the horizontal to the earth). The essential requirement is that the reference radiometer shall have been calibrated at essentially the same tilt from horizontal as the tilt employed in the transfer of calibration.

1.5 The primary reference instrument shall not be used as a field instrument and its exposure to sunlight shall be limited to calibration or intercomparisons.

Note 1: At a laboratory where calibrations are performed regularly it is advisable to maintain a group of two or three reference radiometers that are included in every calibration. These serve as controls to detect any instability or irregularity in the standard reference instrument.

1.6 Reference standard instruments shall be stored in a manner as to not degrade their calibration.

1.7 The method of calibration specified for total solar pyranometers shall be traceable to the World Radiometric Reference (WRR) through the calibration methods of the reference standard instruments (Test Methods G167 and E816), and the method of calibration specified for narrow- and broad-band ultraviolet radiometers shall be traceable to the National Institute of Standards and Technology (NIST), or other internationally recognized national standards laboratories (Test Method G138).

1.8 This standard does not purport to address all of the safety concerns, if any, associated with its use. It is the responsibility of the user of this standard to establish appropriate safety and health practices and determine the applicability of regulatory limitations prior to use.

Significance and Use:

The methods described represent the preferable means for calibration of field radiometers employing standard reference radiometers. Other methods involve the employment of an optical bench and essentially a point source of artificial light. While these methods are useful for cosine and azimuth correction analyses, they suffer from foreground view factor and directionality problems. Transfer of calibration indoors using artificial sources is not covered by this test method.

Traceability of calibration of global pyranometers is accomplished when employing the method using a reference global pyranometer that has been calibrated and is traceable to the World Radiometric Reference (WRR). For the purposes of this test method, traceability shall have been established if a parent instrument in the calibration chain participated in an International Pyrheliometric Comparison (IPC) conducted at the World Radiation Center (WRC) in Davos, Switzerland. Traceability of calibration of narrow- and broad-band radiometers is accomplished when employing the method using a reference ultraviolet radiometer that has been calibrated and is traceable to the National Institute of Standards and Technology (NIST), or other national standards organizations. See Zerlaut for a discussion of the WRR, the IPCs, and their results.
The reference global pyranometer (for example, one measuring hemispherical solar radiation at all wavelengths) shall have been calibrated by the shading-disk or component summation method against one of the following instruments:

An absolute cavity pyrheliometer that participated in a WMO sanctioned IPCs (and therefore possesses a WRR reduction factor),

An absolute cavity radiometer that has been intercompared (in a local or regional comparison) with an absolute cavity pyrheliometer meeting the requirements given in 5.2.1.1.

A WMO First-Class pyrheliometer that was calibrated by direct transfer from such an absolute cavity.

Alternatively, the reference pyranometer may have been calibrated by direct transfer from a World Meteorological Organization (WMO) First-Class pyranometer that was calibrated by the shading-disk method against an absolute cavity pyrheliometer possessing a WRR reduction factor, or by direct transfer from a WMO Standard Pyranometer (see WMO’s Guide WMO No. 8 for a discussion of the classification of solar radiometers).

Note 4: Any of the absolute radiometers participating in the above intercomparisons and being within ±0.5 % of the mean of all similar instruments compared in any of those intercomparisons, shall be considered suitable as the primary reference instrument.

The reference ultraviolet radiometer, regardless of whether it measures total ultraviolet solar radiation or narrowband UV-A or UV-B radiation, or a defined narrowband segment of ultraviolet radiation, shall have been calibrated by one of the following:

By comparison to a standard source of spectral irradiance that is traceable to NIST or to the appropriate national standards organizations of other countries (using appropriate filter correction factors).

By comparison to the integrated spectral irradiance in the appropriate wavelength band of a spectroradiometer that has itself been calibrated against such a standard source of spectral irradiance, and by comparison to a spectroradiometer that has participated in a regional or national Intercomparison of Spectroradiometers, the results of which are of reference quality.

Note 5: The calibration of reference ultraviolet radiometers using a spectroradiometer, or by direct calibration against standard sources of spectral irradiance (for example, deuterium or 1000 W tungsten-halogen lamps) is the subject of Test Method G138.

The calibration method employed assumes that the accuracy of the values obtained is independent of time of year within the constraints imposed by the test instrument’s temperature compensation (neglecting cosine errors). The method permits the determination of possible tilt effects on the sensitivity of the test instrument’s light receptor.

The principal advantage of outdoor calibration of radiometers is that all types of radiometers are related to a single reference under realistic irradiance conditions.

The principal disadvantages of the outdoor calibration method are the time required and the fact that the natural environment is not subject to control (but the calibrations therefore include all of the instrumental characteristics of both the reference and test radiometers that are influenced simultaneously by the environment). Environmental circumstances such as ground reflectance or shading, or both, must be minimized and affect both instruments similarly.

The reference radiometer must be of the same type as the test radiometer, since any difference in spectral sensitivity between instruments will result in erroneous calibrations. The reader is referred to ISO TR 9673 and ISO TR 9901 for discussions of the types of instruments available and their use.

ASTM E816-15 Standard Test Method for Calibration of Pyrheliometers by Comparison to Reference Pyrheliometers

Scope:

1.1 This test method has been harmonized with and is technically equivalent to, ISO 9059.

1.2 Two types of calibrations are covered by this test method. One is the calibration of a secondary reference pyrheliometer using an absolute cavity pyrheliometer as the primary standard pyrheliometer, and the other is the transfer of calibration from a secondary reference to one or more field pyrheliometers. This test method prescribes the calibration procedures and the calibration hierarchy, or traceability, for the transfer of the calibrations.

NOTE 1: It is not uncommon, and is indeed desirable, for both the reference and field pyrheliometers to be of the same manufacturer and model designation.

1.3 This test method is relevant primarily for the calibration of reference pyrheliometers with field angles of 5 to 6°, using as the primary reference instrument a self-calibrating absolute cavity pyrheliometer having field angles of about 5°. Pyrheliometers with field angles greater than 6.5° shall not be designated as reference pyrheliometers.

1.4 When this test method is used to transfer calibration to field pyrheliometers having field angles both less than 5° or greater than 6.5°, it will be necessary to employ the procedure defined by Angstrom and Rodhe.

1.5 This test method requires that the spectral response of the absolute cavity chosen as the primary standard pyrheliometer be nonselective over the range from 0.3 to 10 μm wavelength. Both reference and field pyrheliometers covered by this test method shall be nonselective over a range from 0.3 to 4 μm wavelength.

1.6 The primary and secondary reference pyrheliometers shall not be field instruments, and their exposure to sunlight shall be limited to calibration or intercomparisons. These reference instruments shall be stored in an isolated cabinet or room equipped with standard laboratory temperature and humidity control.

NOTE 2: At a laboratory where calibrations are performed regularly, it is advisable to maintain a group of two or three secondary reference pyrheliometers that are included in every calibration. These serve as controls to detect any instability or irregularity in the standard reference pyrheliometer.

1.7 This test method is applicable to calibration procedures using natural sunshine only.

Significance and Use:

4.1 Though the sun trackers employed, the number of instantaneous readings, and the data acquisition equipment used will vary from instrument to instrument and from laboratory to laboratory, this test method provides for the minimum acceptable conditions, procedures, and techniques required.

4.2 While the greatest accuracy will be obtained when calibrating pyrheliometers with a self-calibrating absolute cavity pyrheliometer that has been demonstrated by intercomparison to be within ±0.5 % of the mean irradiance of a family of similar absolute instruments, acceptable accuracy can be achieved by careful attention to the requirements of this test method when transferring calibration from a secondary reference to a field pyrheliometer.

4.3 By meeting the requirements of this test method, traceability of calibration to the World Radiometric Reference (WRR) can be achieved through one or more of the following recognized intercomparisons:

4.3.1 International Pyrheliometric Comparison (IPC) VII, Davos, Switzerland, held in 1990, and every five years thereafter, and the PMO-2 absolute cavity pyrheliometer that is the primary reference instrument of WMO.

4.3.2 Any WMO-sanctioned intercomparison of self-calibrating absolute cavity pyrheliometers held in WMO Region IV (North and Central America).

4.3.3 Any sanctioned or non-sanctioned intercomparison held in the United States, the purpose of which is to transfer the WRR from the primary reference absolute cavity pyrheliometer maintained as the primary reference standard of the United States by the National Oceanic and Atmospheric Administration’s Solar Radiation Facility in Boulder, CO.

4.3.4 Any future intercomparisons of comparable reference quality in which at least one self-calibrating absolute cavity pyrheliometer is present that participated in IPC VII or a subsequent IPC, and in which that pyrheliometer is treated as the intercomparison’s reference instrument.

4.3.5 Any of the absolute radiometers participating in the above intercomparisons and being within ±0.5 % of the mean of all similar instruments compared in any of those intercomparisons.

4.4 The calibration transfer method employed assumes that the accuracy of the values obtained are independent of time of year and, within the constraints imposed, time of day of measurements. With respect to time of year, the requirement for normal incidence dictates a tilted angle from the horizontal that is dependent on the sun’s zenith angle and, thus, the air mass limits for that time of year and time of day.

ASTM G167-15 Standard Test Method for Calibration of a Pyranometer Using a Pyrheliometer

Scope:

1.1 This test method covers an integration of previous Test Method E913 dealing with the calibration of pyranometers with axis vertical and previous Test Method E941 on the calibration of pyranometers with axis tilted. This amalgamation of the two methods essentially harmonizes the methodology with ISO 9846.

1.2 This test method is applicable to all pyranometers regardless of the radiation receptor employed and is applicable to pyranometers in horizontal as well as tilted positions.

1.3 This test method is mandatory for the calibration of all secondary standard pyranometers as defined by the World Meteorological Organization (WMO) and ISO 9060, and for any pyranometer used as a reference pyranometer in the transfer of calibration using Test Method E842.

1.4 Two types of calibrations are covered: Type I calibrations employ a self-calibrating, absolute pyrheliometer, and Type II calibrations employ a secondary reference pyrheliometer as the reference standard (secondary reference pyrheliometers are defined by WMO and ISO 9060).

1.5 Calibrations of reference pyranometers may be performed by a method that makes use of either an altazimuth or equatorial tracking mount in which the axis of the radiometer’s radiation receptor is aligned with the sun during the shading disk test.

1.6 The determination of the dependence of the calibration factor (calibration function) on variable parameters is called characterization. The characterization of pyranometers is not specifically covered by this method.

1.7 This test method is applicable only to calibration procedures using the sun as the light source.

1.8 This standard does not purport to address all of the safety concerns, if any, associated with its use. It is the responsibility of the user of this standard to establish appropriate safety and health practices and determine the applicability of regulatory limitations prior to use.

Looking for calibration services?

Explore
Drag